Certificates
See why customers choose Pleasant Password Server with a KeePass client
Certificates are a foundation of authentication and security for software and websites. A certificate is used to identify the software or device as trustworthy when it interacts with other software and devices.
Trust is established by having a well-known Certificate Authority (CA) provide a Certificate, verifying that the software in question has not been tampered with by a third-party. Usually CA's charge a fee in exchange for this service, but there are popular CA's now that provide this service free of charge.
We recommend using a third-party certificate from a reputable CA in your production environment, which provides an additional level of security and safeguards, especially when making your Pleasant Password Server available in an external domain.
For testing, or temporary use, or in some internal environments, it may be appropriate or necessary to create and use Self-Signed Certificates.
Have Questions? Contact Us!
Sections:
- Resolve Certificate Warnings
- Get a Certificate
- Import a Certificate
- Automate Certificate Changes
- Distribute Certificates to Other Devices
Related:
Resolve Certificate Warnings
Pleasant Password Server comes with a default certificate which validates the software origin.
This certificate should be replaced with a third-party certificate (recommended) before going live with the site. For testing or internal purposes there are other options to remove the security warnings.
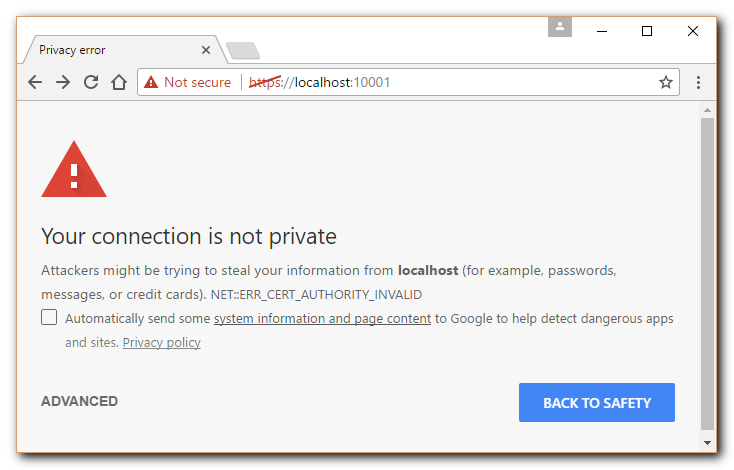
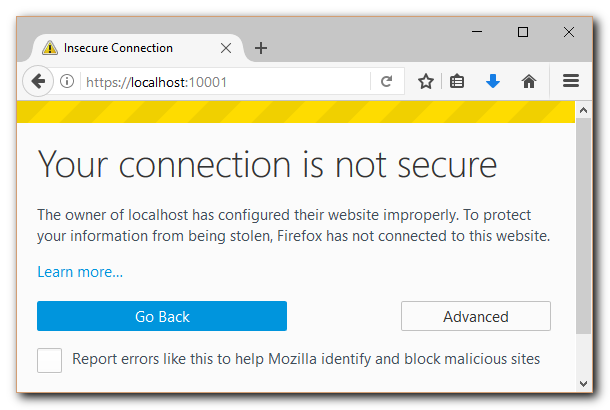
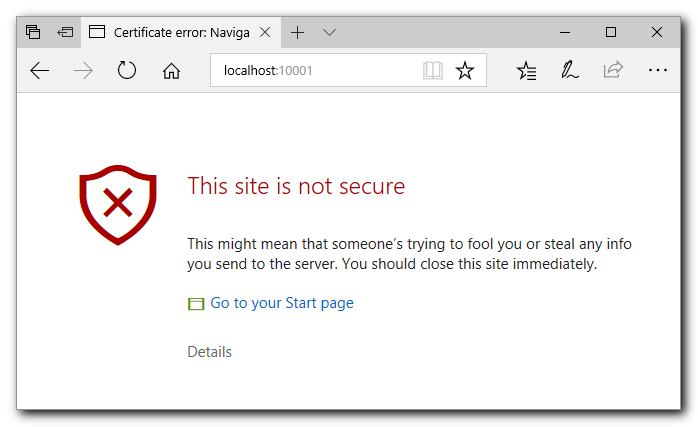
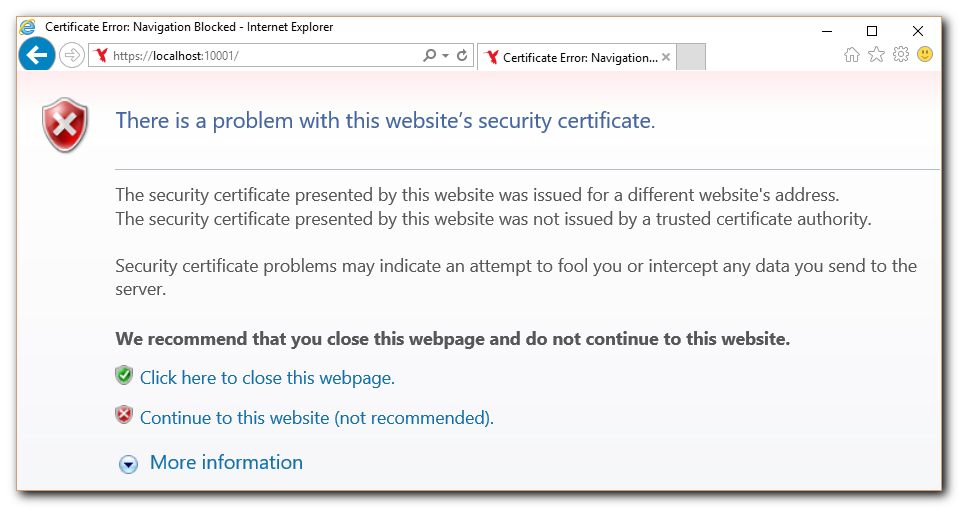
Browsers will provide security warnings until Pleasant Password Server is configured with a valid certificate that matches the site domain which is displayed in the browser URL, and is signed by a trusted Certificate Authority.
To resolve these errors, see the information.
|
Chrome Browser: |
Firefox Browser: |
|
Edge Browser:
|
Internet Explorer Browser:
|
Resolve Temporarily:
For temporary use, testing, or in secure internal settings (e.g. connecting to our own computer, on a trusted internal connections), we can choose to continue:
- Chrome: Click Advanced, and, Proceed to localhost (unsafe)
Resolve Permanently: remove these errors, following the steps below to either:
- Production: Get a third-party certificate (highly recommended) that is trusted by browsers and devices by default, OR,
- Test/Internal setting: Generate a certificate (for a test/internal site)
- Firefox Browser:
- Choose to "add a permanent certificate exception" in your browser
- This is necessary if the browser does not trust your certificate's Certificate Authority (CA)
- Firefox Browser:
Get a Certificate
Certificate Types
Production sites should use a Third-Party Certificate. This establishes a very high level of trust with your users.
-
-
Request and purchase a certificate from a trusted Certificate Authority (CA). This option provides a high level of trust as the CA verifies your domain and sometimes your organization.
-
-
-
Obtain a free certificate from Let's Encrypt, a non-profit CA run by Internet Security Research Group (ISRG) that provides X.509 certificates for Transport Layer Security (TLS) encryption at no charge.
-
-
-
Generate a Certificate and Certificate Authority. While this option is not recommended for a production environment due to the lack of third-party verification, it can be useful for testing or internal applications.
-
-
Internal Certificate Management
-
Generate a certificate using your organization's established internal certificate management process. This is typically used in an enterprise environment where the organization operates its own private CA.
-
Remember to always ensure to keep your private keys secure and renew your certificates before they expire to maintain the integrity and availability of your website.
If you need more information, please Contact Us.
Install a Third-Party Certificate
Obtaining a certificate from a third-party is recommended.
Process Overview:
-
Fill out a Certificate Signing Request (CSR) and submit it to a trusted Certificate Authority (CA)
- The CA will then establish that you own the domain, and have proper control.
- Double-check that the CA's certificates are trusted for the device platforms. Trusted Root Certificate Lists: Windows Platform, MacOS Platform, iOS Mobile
-
- Use the Service Config Utility, or using the PowerShell commands (section below)
- Windows Start menu > Programs > Pleasant Password Server > Service Configuration
- Get the certificate with private key by:
- Either export the certificate from the same machine you generated the CSR
- open mmc (run command), right-click on the certificate, and export with private key
- If necessary, convert the certificate from the CA to *.pfx, or *.p12 format:
- Import the certificate with mmc (windows run command), then export into the .pfx format
- Alternatively, use OpenSSL commands
- Use the Service Config Utility, or using the PowerShell commands (section below)
-
(With IIS Hosting) Configure the Certificate in the site bindings.
-
(If necessary) Distribute the public certificate to other devices
Install a Self-Signed Certificate
Only use temporarily, for testing, or in secure internal environments.
Security Considerations:
- Self-Signed Certificates, are generally considered a less secure option than Third Party Certificates. Microsoft warns that self-signed certificates are more susceptible to man-in-the-middle attacks, not suitable for a production server environment or for sites connected to the internet.
Process Overview:
-
Generate a certificate using this detailed guide.
-
Then, upload the certificate with the Service Configuration utility or using the PowerShell commands (section below)
-
Windows Start menu > Programs > Pleasant Password Server > Service Configuration
-
Import a Certificate
To change the Certificate that Password Server uses, run the Pleasant Service Configuration Utility that was packaged and installed with the server.
Follow these steps:
-
Start the Service Configuration Utility.
- Windows Start menu > Pleasant Password Server -> Service Configuration
-
Click Certificate Configuration -> Click Import Certificate
-
Browse for and select the Certificate file (must be a *.pfx or *.p12 private key certificate file):
- If necessary, convert the Certificate to *.pfx, or *.p12 format, by either:
- Using mmc run command, first import the certificate, then export into the pfx format
- Using OpenSSL commands
- If necessary, convert the Certificate to *.pfx, or *.p12 format, by either:
-
Enter the password for your certificate.
-
Restart the Password Server service (click here for instructions).
-
Navigate to the server URL in your browser.
- Note: that sometimes browsers or devices may cache the old certificate, and so you may find the warning persists temporarily. In this case, double-check from a incognito tab or by refreshing the browser cache.
Clear Certificate:
The Certificate used can be reverted back to the default placeholder certificate at any time by clicking the Clear button within the Certificate Configuration section of the Service Configuration Utility.
This setting will persist through future updates of Pleasant Password Server.
Change Certificates with PowerShell Commands
Here is some PowerShell commands that can be used to change certificates when you are renewing a certificate or adding a certificate for the first time. The certificate name and location will also be set in the registry. Change the values in the scripts, such as certificate name, user name, password.
-
PowerShell commands:
# Stop service
Stop-Service "Pleasant Password Server"

# Restart service
Restart-Service "Pleasant Password Server"

# List your Certificates; Also checks if the certificate path is accessible
Get-ChildItem Cert:\LocalMachine\My

# Check if registry points at correct certificate
Get-ItemProperty "HKLM:\Software\Pleasant Solutions\PasswordManager"

# Delete previous certificate, in case it's a renewal
Get-ChildItem Cert:\LocalMachine\My | Where-Object {$_.Subject -Like "CN=PasswordServer-Production-Certificate*" } | Remove-Item

# Import new certificate
Import-PfxCertificate -FilePath New-Certificate.pfx -CertStoreLocation Cert:\LocalMachine\My -Password (Get-Credential -UserName "PFX" -Message "PFX Password").Password

# Update registry to point at correct certificate, if needed
Set-ItemProperty "HKLM:\Software\Pleasant Solutions\PasswordManager" -Name CertificateName -Value "PasswordServer-Production-Certificate"
Set-ItemProperty "HKLM:\Software\Pleasant Solutions\PasswordManager" -Name ThumbPrint -Value "63DF81FF0024F999D2A5B077F6152480E6C31F0"
Here is a list of the certificate registry keys:
-
Certificate Registry Settings:
[HKEY_LOCAL_MACHINE\Software\Pleasant Solutions\PasswordManager]
"CertificateName"="PasswordServer_Temporary_Placeholder_Certificate"
"StoreName"="My"
"StoreLocation"="LocalMachine"
Automate Certificate Changes
When using a free site certificate service, you may wish to automate the changing of the certificates which would include the following items in your script:
-
Get the new certificate
-
Stop the service (IISExpress) or website (IIS)
-
Remove the old certificate from the Certificate Store
-
Put the new certificate into the Certificate Store
-
Start the service / site again
Distribute the Certificate to Other Devices
The Certificate Authority (CA) of a certificate must be trusted. By default a reputable third-party certificate is already trusted by browsers and devices, but if you have generated a certificate or have an internal CA, then you will need to ensure that the public certificate is distributed to the other networked computer workstations or devices.
This can be done by exporting the public certificate (without the private key) from the Password Server computer and then importing it on other computers.
Some customers may wish to further automate the distribution using scripts or using their directory's Group Policy.
Here are the simple steps.
-
Open the Microsoft Management Console (MMC).
- Type mmc.exe in the Start menu search box or open a Run... dialog, type mmc.exe and click OK.
-
Click File -> Add/Remove Snap-in...
-
Add the Certificates snap-in.
- (Windows Vista/7) Click Certificates from the left pane and click Add.
- (Other Windows versions) Click Add... then select Certificates and click Add.
-
Select Computer Account and click Next.
-
Select Local Computer and click Finish.
-
Exit the open dialog(s).
In the list of folders on the left, the top folder should be Personal followed by Trusted Root Certification Authorities.
These folders represent the various certificate stores for the local computer.
-
Open Trusted Root Certificate Authorities -> Certificates.
-
Locate the certificate with your computer name.
-
Right-click on the certificate and select All Tasks -> Export...
-
Follow the Certificate Export Wizard to save the certificate file.
- Select: No, do not export the private key
- Select: Base-64 encoded X.509 (.cer)
-
Specify a location and file name for the certificate.
Securely transport the certificate to your other workstation so that it can be imported. Use the MMC Certificate snap-in as above.
-
Right-click on Trusted Root Certification Authorities and select All Tasks -> Import...
-
Select your certificate file.
-
Complete the Certificate Import Wizard.


