
Postman API Examples
Use KeePass with Pleasant Password Server
Below are examples of managing Passwords with Pleasant Password Server through Postman a RESTful API Developer tool. These have been provided as a starting point to get you going.
Applies to:
- RESTful API versions 4 & 5.
- RESTful API v6 introduces some improvements.
Notes:
- This section is still in progress!
- These examples are provided as-is; if you do find an error or an improvement, please let us know so they can be updated.
Index of Examples:
- Authorization
- Get Root Id
- Create Folder
- Update Folder
- Create Entry
- Update Entry
- Site Credentials
- Plugin Policy
- Credential Identifiers List
Postman Environment Setup
Click New in the top left hand corner of the screen to create a new environment, and provide a meaning full name.
Select environments by clicking the drop down on the far right.
Postman Examples
Post Authorization
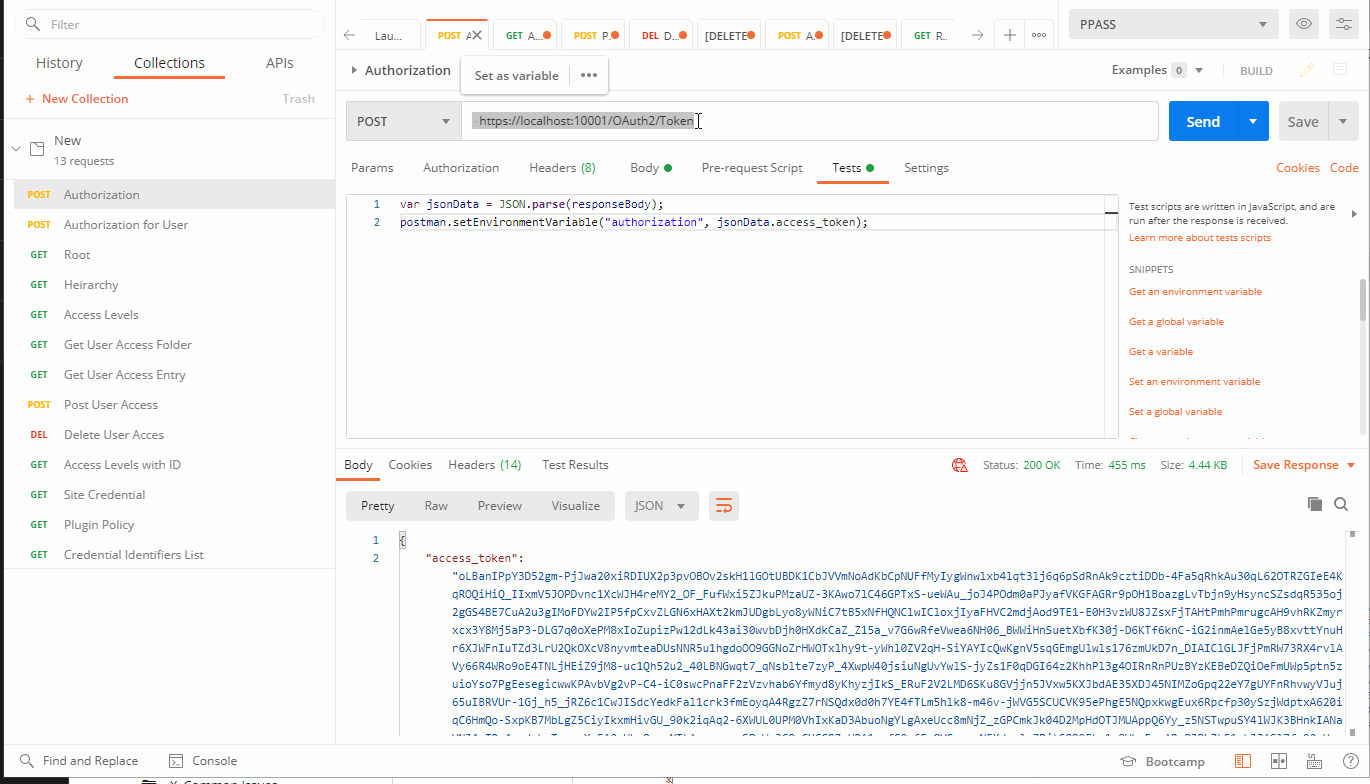
POST: https://localhost:10001OAuth2/Token
Body Tab - x-www-form-urlencoded:
{
Key Value
grant_type password
username admin
password [password value]
}
Test Tab:
{
var jsonData = JSON.parse(responseBody);
postman.setEnvironmentVariable("authorization", jsonData.access_token)
}
Then we can hit send.
Results: Just under the New environment button on the left hand side we see History and Collection tabs. After successfully getting the authorization token you can click the 3 dots on the line for the Post Authorization command we just used. Choose Save Request as "Authorization" then we can move over to the collections tab to re-use these later.
Get Root
From the collations tab duplicate our one record "Authorization" and rename it to "Root."
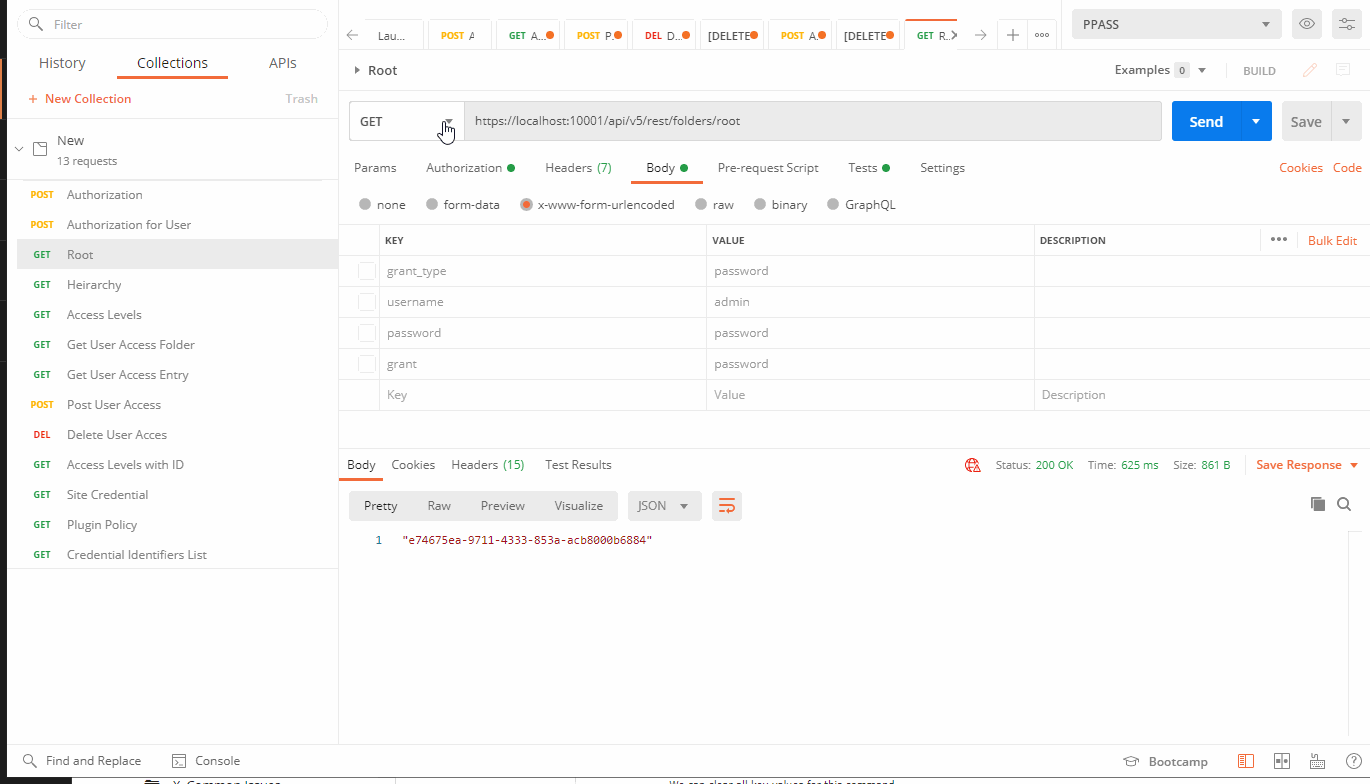
GET: https://localhost:10001/api/v5/rest/folders/root
Authorization Tab:
{
Type: Bearer Token
Token: {{authorization}}
}
Body Tab:
{
We can clear all key values for this command.
}
Test Tab:
{
postman.setEnvironmentVariable("root_id", JSON.parse(responseBody));
}
Then hit sent.
Results: Root of Created Folder
If it was successful you'll want to save your command using the save button to the right of the send button.
Get Hierarchy
Again from the collations tab duplicate our last record "Root" and rename it to "Hierarchy."
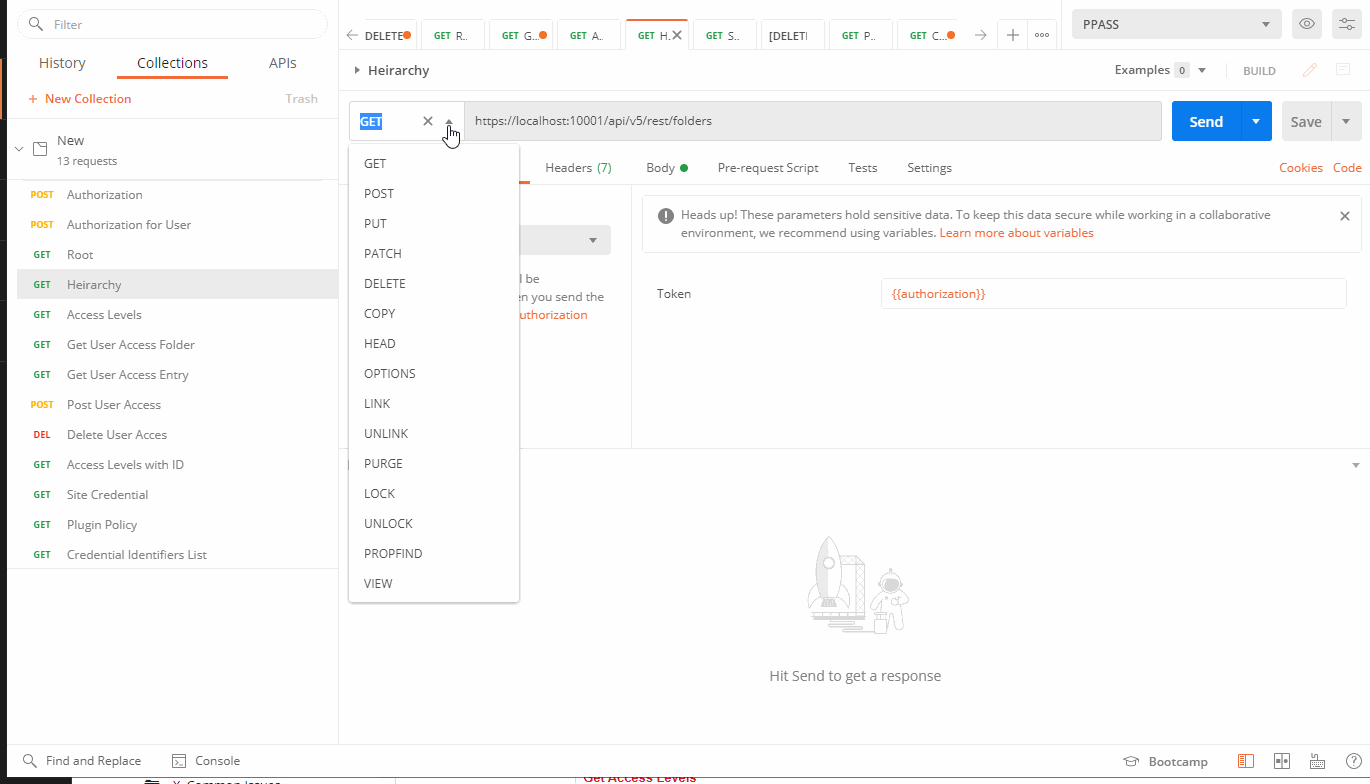
GET: https://localhost:10001/api/v5/rest/folders
Content:
{
The Authorization, Body tabs will all be the same as Get Root. But we'll want to clear out the Tests tab.
}
Hit send. If successful don't forget to save your command.
Get Access Levels
Again from the collations tab duplicate our last record "Hierarchy" and rename it to "Access Levels."
NOTE: For this command to work successfully you will need to turn on "Allow API modification of User Access" in PPASS > Settings > General > API
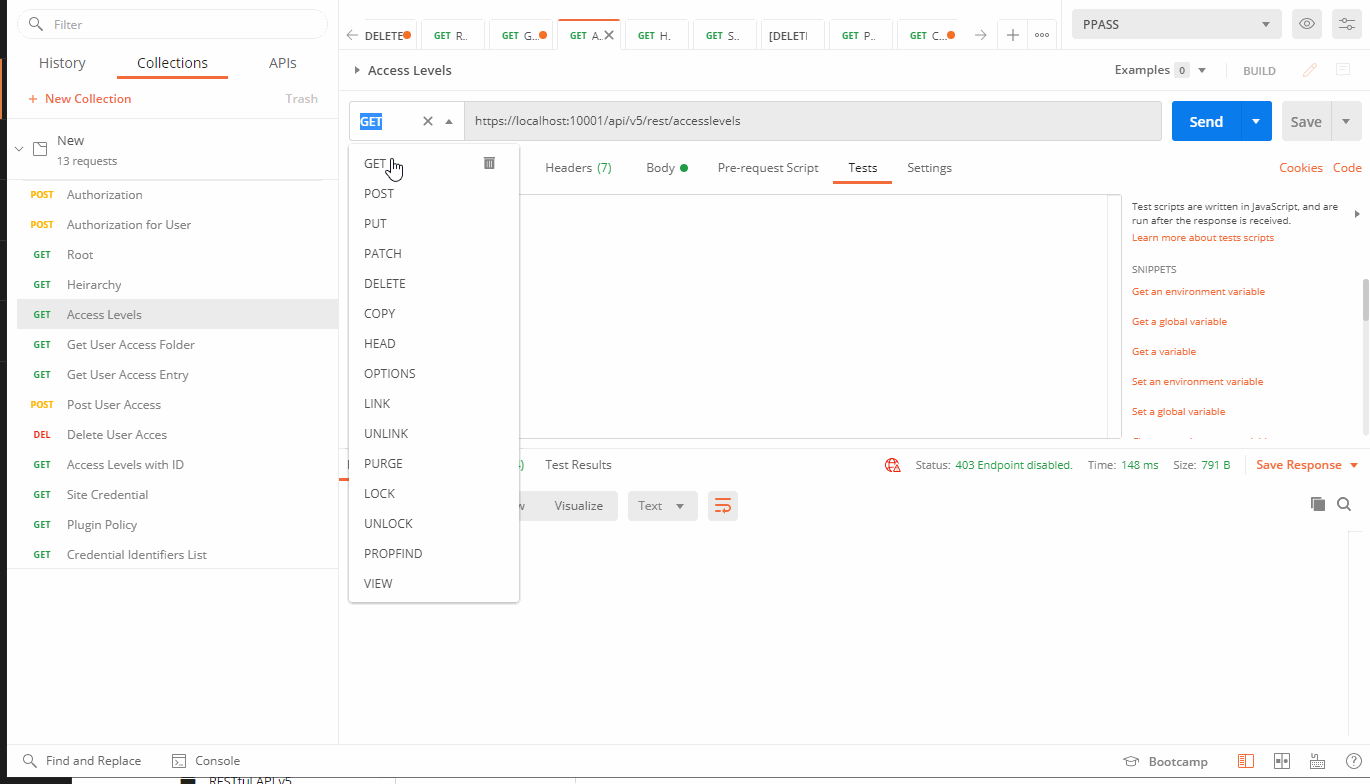
GET: https://localhost:10001/api/v5/rest/accesslevels
Content:
{
The Authorization, Body and Tests tabs will all be the same as get Hierarchy.
}
Hit send. If successful don't forget to save your command.
Get User Access - Entry
Again from the collations tab duplicate our last record "Access Levels" and rename it to "User Access."
GET: https://localhost:10001/api/v5/rest/entries/{{entry_id}}/useraccess
Content:
{
The Authorization, Body and Tests tabs will all be the same as get Access Levels.
}
Hit send. If successful don't forget to save your command.
Get Access Level - ID
Again from the collations tab duplicate our last record "User Access" and rename it to "Get Access Level - ID."
GET: https://localhost:10001/api/v5/rest/folders/{{root_id}}/accesslevels
Content:
{
The Authorization, Body and Tests tabs will all be the same as get User Access - Entry.
}
Results: Grants the user a view of every area the logged in user has access to change.
Hit send. If successful don't forget to save your command.
Post User Access - Folder
POST: https://localhost:10001/api/v5/rest/credentialgroups/{{root_id}}/useraccess
Body - Raw:
{
"UserId": "9200cb0a-ec3a-4e10-a91d-abd70117281a",
"RoleId": "",
"ZoneId": "",
"PermissionSetId": "c58ad37e-88a2-4fe2-abc8-6e01d9342cba",
"AccessExpiry": ""
}
Delete User Access - Folder
This endpoint has two separate ways to access it:
With Variable:
Delete: https://localhost:10001/api/v5/rest/credentialgroups/{{root_id}}/useraccess{{accessrow_id}}
Without Variable:
Delete: https://localhost:10001/api/v5/rest/credentialgroups/{{root_id}}/useraccess<ID of new Access Row>
Body Tab - Raw:
{
"UserId": <User ID>",
"RoleId": "",
"ZoneId": "",
"PermissionSetId": "<User Access ID>", (we can pull any of the IDs from our previous Access Level statement and paste those here to perform the update)
"AccessExpiry": "" (optional)
}
It's important to note that we can set at the User ID, or role ID level but we can't have a value for both at the same time.
Authorization Tab:
{
Type: Bearer Token
Token: {{authorization}}
}
Test Tab:
This is not necessary, but if we are just testing and would like to delete our newly created record easily we can set an entry in this tab like so:
{
postman.setEnvironmentVariable("accessrow_id", JSON.parse(responseBody));
}
(this will create the variable "accessrow_id" which we will make use of in our delete)
Hit send. If successful don't forget to save your command.
Results: The response Body gives 1 line response which is the ID of the new access row we just created. (if we don't want to use the accessrow_id method we can copy this value and use it in the below delete command instead.)
If we want to delete this same row we can copy the Post User Access - Folder command
Get Site Credential
This endpoint returns the entry with matching URL which we will input in the body. If more than one credential matches this, it picks the first one alphabetically.
Update the URL to:
GET: https://localhost:10001/api/v6/rest/sitecredential
Body - Raw:
{
"url": "http://www.website.com/page"
}
Authorization Tab:
{
Type: Bearer Token
Token: {{authorization}}
}
Get Plugin Policy
Returns the Policy values settings necessary in running the Auto-fill plugin.
GET: https://localhost:10001/api/v6/rest/pluginpolicy
Content:
{
Clear the Body values
}
Authorization Tab:
{
Type: Bearer Token
Token: {{authorization}}
}
Get Credential Identifiers List
Returns the Id, Name, Username and URL of all credentials the authorized user has access to.
GET: https://localhost:10001/api/v6/rest/credentialidentifierslist
Authorization Tab:
{
Type: Bearer Token
Token: {{authorization}}
}
List of Aliases
https://localhost:10001/api/v5/rest/folders/{{root_id}}/useraccess
https://localhost:10001/api/v5/rest/credentialgroup/{{root_id}}/useraccess
https://localhost:10001/api/v5/rest/credentialgroups/{{root_id}}/useraccess